Editing Workshop 2 - Dialogue Sequence
Editing Workshop 2 - Dialogue Sequence
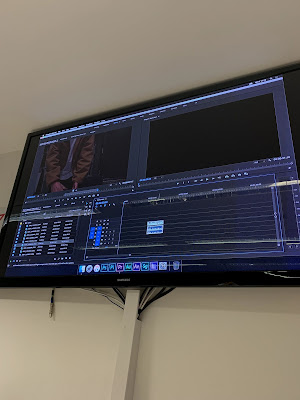
In this post I will be writing about how me and my partner edited the dialogue sequence in the editing suite.
Once we did that, we started adding the footage on to the timeline to start producing a video. From what we added we started moving things around and placing them at the most suitable time. We did this because, it gives an overview of what footage there is and how it will fit in to the scene smoothly.
The skills I learnt were that I remembered always to repeat command+S regularly so no work is vanished. As well as this, I created the log bin whilst renaming all clips I chose. I also used the cropping tools to get the right amount of length I needed for each clip. Something I newly learnt was adding the titles which is adding a text box on to the video and after this you can edit it any way you please. Additionally to this when you've added a text box you need to make sure that you've added an action safe, within this you ensure that the title is enclosed by the title safe.

The mistakes I made were few, but sometimes I couldn't specifically remember every bit that needed to be done. I mainly forgot how to time the videos in well together, however, my mentor then showed me and by then I understood and was up to date. I will make sure not to do this again by a lot of practice and by getting familiar with Adobe Premiere Pro with time.
In the second editing workshop me and Gabby edited footage from the day before that someone had filmed of two people having a short conversation. We got in to our groups and started editing from the footage that was there. From what we learnt from the first editing workshop, we added a log bin where we would add on all of the clips we thought were the best and renamed them so we knew which one was which.
Once we did that, we started adding the footage on to the timeline to start producing a video. From what we added we started moving things around and placing them at the most suitable time. We did this because, it gives an overview of what footage there is and how it will fit in to the scene smoothly.
The skills I learnt were that I remembered always to repeat command+S regularly so no work is vanished. As well as this, I created the log bin whilst renaming all clips I chose. I also used the cropping tools to get the right amount of length I needed for each clip. Something I newly learnt was adding the titles which is adding a text box on to the video and after this you can edit it any way you please. Additionally to this when you've added a text box you need to make sure that you've added an action safe, within this you ensure that the title is enclosed by the title safe.

The mistakes I made were few, but sometimes I couldn't specifically remember every bit that needed to be done. I mainly forgot how to time the videos in well together, however, my mentor then showed me and by then I understood and was up to date. I will make sure not to do this again by a lot of practice and by getting familiar with Adobe Premiere Pro with time.
When I looked at the finished footage, I felt like I would have payed more attention to the audio and how they are put together to sound smoother and more realistic because at one part the girl sitting down wasn't in sync to the audio which didn't make it look professional.
In my actual title sequence I will pay more attention to how the audio is placed and to make sure all footage is placed clearly and not too complicated. From this editing workshop, I have learnt that the best way to make the scene professionally is by only using a few closeups and standard shots when it comes to people having a conversation, since there is no reason for the audience to view all small actions that are made (for example; a long shot of a door closing which isn't relevant). This can take away the attention from the main character who the audience should be thinking of.
Here is the final dialogue sequence:


Comments
Post a Comment