Editing Workshop 1
Editing Workshop 1
In this post I will be writing about what we learnt from the workshop surrounded by how a sequence will be edited and all of the start steps.
In this post I will be writing about what we learnt from the workshop surrounded by how a sequence will be edited and all of the start steps.
EDITING SOFTWARE:
- Adobe Premiere Pro CC

THE GOLDEN RULE:
- It is the golden rule because computers are very known to crash at times from all the activation that is occurring this means if you haven't saved the work and the computer crashes. You will not be able to ever get it back.
- Where as if you save after a few changes have been made, the footage and edit will always be safe.
FOOTAGE, RUSHES AND DAILY'S:
- Footage is all of the videos taken of the scene separately to choose the best ones from.
- You always have the footage there for in the future if you wanted to make any changes in the sequence.
- Rushes is to describe the raw footage from a day's shooting for any scene.
- Daily's is similar to rushes, which is basically also the raw footage shot during the production of a sequence.
- Rushes/Daily's are referring to the speed with which they must be prepared in.
CUTTING TOOL:
- The cutting tool is where you can crop any video to the length you want it to be by pressing Keyboard I to crop and Keyboard O to where it finishes.
- When you've done that you drag the video onto the timeline.
- The short cutting keys are as I wrote up (command+I = crop) (command+O = out).
'+' AND '-':
- This is to either zoom in or zoom out from the timeline so it can be easier to see the shots, as well as moving the footage from mineys to frames as you zoom in closer.
TIMELINE:
- The timeline is where all the editing operations are put on and a place where you can change the placement of the videos.
- On the timeline you can shorten the videos exactly where it is needed to be.
THE 4 DIFFERENT SECTIONS:
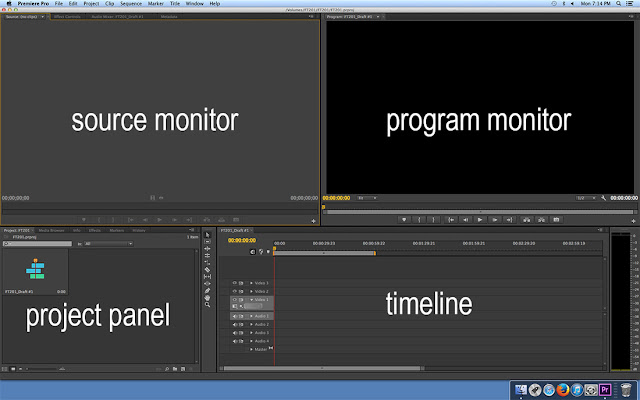
- There are four different sections on the screen two of which are video screens. On the left video screen is where all footage can be played and where you can cut them to drag on the timeline. The video screen on the right is where all timeline operations will be played.
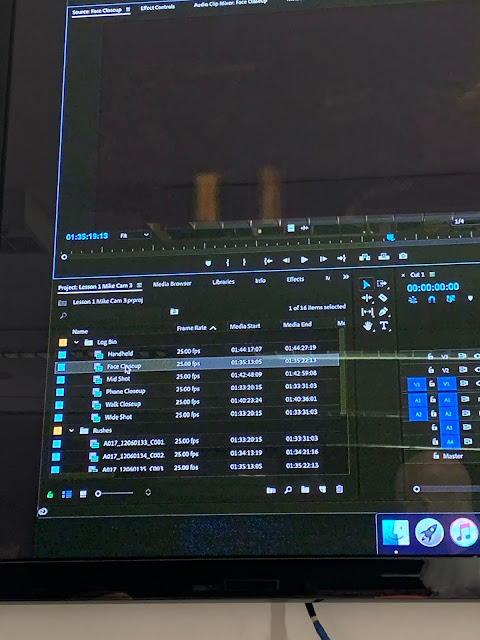
- On the bottom left there is the project window (panel) which is like the finder of folders or files stored on the computer.
- On the bottom right there is the timeline where all changes are made for the actual finishing video.
SHORTCUT FOR UNDO:
- Cmd+Z
- Adobe Premiere Pro CC

THE GOLDEN RULE:
- It is the golden rule because computers are very known to crash at times from all the activation that is occurring this means if you haven't saved the work and the computer crashes. You will not be able to ever get it back.
- Where as if you save after a few changes have been made, the footage and edit will always be safe.
FOOTAGE, RUSHES AND DAILY'S:
- Footage is all of the videos taken of the scene separately to choose the best ones from.
- You always have the footage there for in the future if you wanted to make any changes in the sequence.
- Rushes is to describe the raw footage from a day's shooting for any scene.
- Daily's is similar to rushes, which is basically also the raw footage shot during the production of a sequence.
- Rushes/Daily's are referring to the speed with which they must be prepared in.
CUTTING TOOL:
- The cutting tool is where you can crop any video to the length you want it to be by pressing Keyboard I to crop and Keyboard O to where it finishes.
- When you've done that you drag the video onto the timeline.
- The short cutting keys are as I wrote up (command+I = crop) (command+O = out).
'+' AND '-':
- This is to either zoom in or zoom out from the timeline so it can be easier to see the shots, as well as moving the footage from mineys to frames as you zoom in closer.
TIMELINE:
- The timeline is where all the editing operations are put on and a place where you can change the placement of the videos.
- On the timeline you can shorten the videos exactly where it is needed to be.
THE 4 DIFFERENT SECTIONS:
- There are four different sections on the screen two of which are video screens. On the left video screen is where all footage can be played and where you can cut them to drag on the timeline. The video screen on the right is where all timeline operations will be played.
- On the bottom left there is the project window (panel) which is like the finder of folders or files stored on the computer.
- On the bottom right there is the timeline where all changes are made for the actual finishing video.
SHORTCUT FOR UNDO:
- Cmd+Z
FINISHED LOOK:


Comments
Post a Comment